How Do I Upload Pictures Into Weebly Assets
Uploading legacy data into Microsoft Dynamics AX is not always an easy task. For case, when yous want to upload fixed assets for multiple legal entities in your existing Dynamics AX environment, adding thousands of records and all related data will crave a lot of dedication and try. This tin also result in errors also. Dynamics AX now features a module congenital around importing and exporting data chosen Data Import Consign Framework (DIXF). At a first glance, using this framework can exist a little overwhelming. However, this blog will demonstrate how to upload a listing of stock-still assets from get-go to terminate using this module.
From a high level this module works in a step by step process:
- Start, a source data format needs to be created
- The data that needs to be migrated volition have to be filled in to the source data format file. It is recommended that after filling the file with data the file be saved equally CSV. This file is then uploaded into a staging environment.
- The staging environment allows you to validate your data and make any necessary changes.
- Lastly, the data in the staging environs is and then uploaded to Dynamics AX.
In this case, my data is in an Excel spreadsheet. All the same, information technology is saved as a CSV file and I chose to utilise headers in my file as well.
Data Type
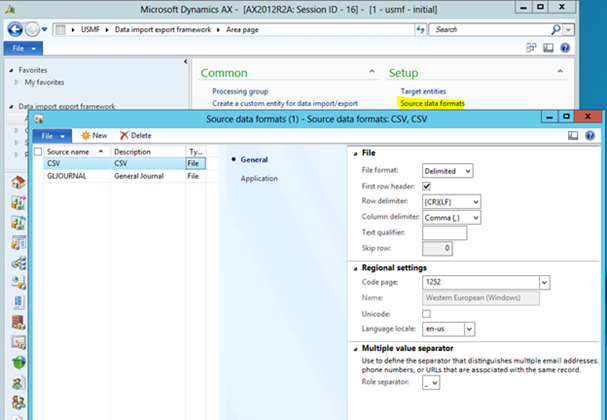
With the data file containing the list of stock-still assets and the relevant data, the first pace in this procedure is to setup the Source information formats. This is the where you make up one's mind which file format you lot will employ. The supported file formats are: delimited, fixed width, XML, and Excel. In my example, using my CSV file, the setup for my Source data formats page is as follows:
- Click new> define a source name and clarification for your reference
- File format: Delimited
- First row header: bank check
- Row delimiter: {CR}{LF}
- Column Delimiter: Comma {,}
- Lastly, define the Multiple value separator, I volition choose an underscore (_)
- Screen should look as pictured below.
- Shut screen
Processing Grouping
The next step is to set upwards the processing group found in the mutual section of the module.
- Give the group a name of your selection.
- Adjacent click Entities
- From the Entities dropdown we will choose Fixed Assets Main
- Source data format: CSV (defined earlier)
- Be sure to click both checkboxes on this screen, Run business logic in insert or update method and Run business validations. Failure to check these boxes, yous are able to upload data into Dynamics AX that has not been validated. Down the road this could cause major issues.
- The next step is to click Generate source file> click next
- Hither you volition select which fields you are uploading from your template to the staging environment
-
- Use the upward and down buttons from this page to exercise so
- The generating your source mapping should look as follows:
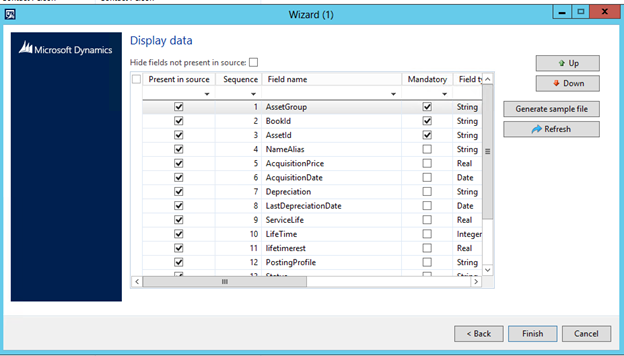
- Click finish. Fill upwards the file that was generate to a higher place every bit shown beneath.

It is important to have the order of the fields align with the headers from your upload file. Once the file is completely filled out, save it every bit a CSV.
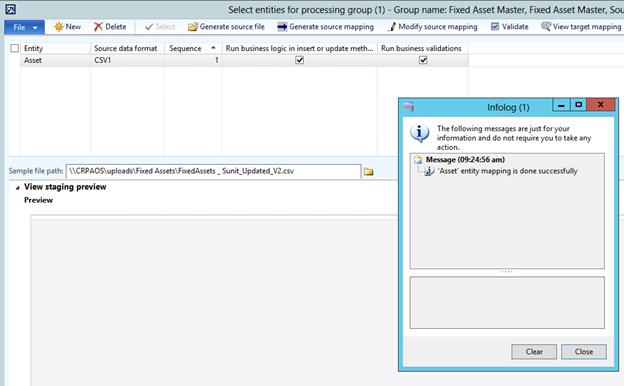
Become Back to DIXF and click the Entities screen> Click the folder next to Sample file path
-
- Here you will choose your CSV file you are wishing to upload.
- Once you chose your respective file, click Generate Source Mapping
- An info log should appear indicating that the entity mapping is done successfully. If not, ensure you saved your file in the correct file format and double check the higher up stride in Generating source file.
- It is important to note: you cannot have the file open up during this process.
- Click Validate and OK.
- Click View Target mapping. This volition display the showtime 10-15 rows of the file that you are trying to upload. Verify that the data is in the right columns.
- Close the form.
Upload
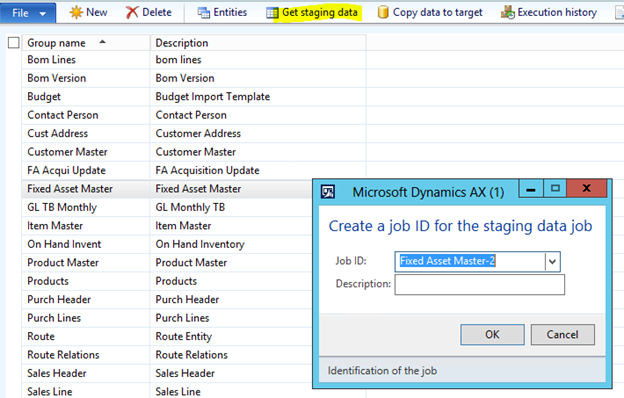
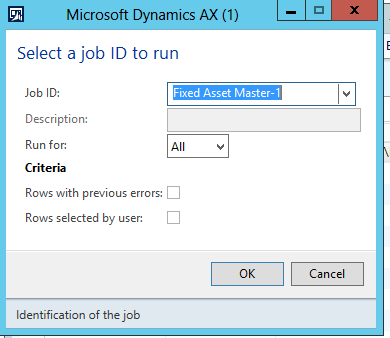
- From the Process grouping form y'all will now click Get Staging Information
- Leave the defaulted Job ID and enter a clarification if you delight
- Click OK
- Ensure the file path is correctly pointing at your CSV file
- Make sure that this file is not open up
- Click Run > OK
- An info log appears that your data has been inserted into staging.
- Your information is now gear up to exist validated and you can make changes if needed
Verify Information
- From the processing grouping screen – select Execution History
- To view the data that is now inserted into the staging environment, click View staging data
- From here you are able to validate the information you lot are planning to load into Dynamics AX and make changes if necessary.
- After the necessary changes take been made you are ready to push button the data into Dynamics AX
- Close the view staging data form.
- Click on Execution History
- View all the data that is inserted in to Staging. Y'all tin nevertheless make corrections to whatever information hither prior to importing concluding information in.
- Click Re-create data to target
- Select the appropriate job ID
- Click OK > Run > OK
- Your data has at present been loaded into Dynamics AX.
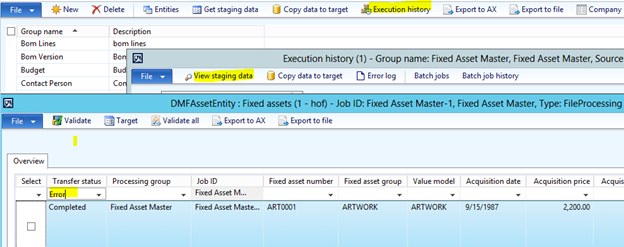
Fault
You might receive an fault on import. To resolve the error on import go to Execution History, Click on View staging information and on the transfer condition field blazon in error. This volition listing all the errors.
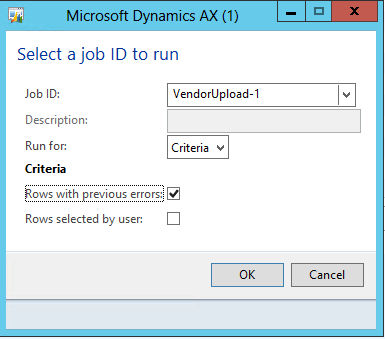
Make necessary corrections to the file. Re-create data to target again and at this time click on the following
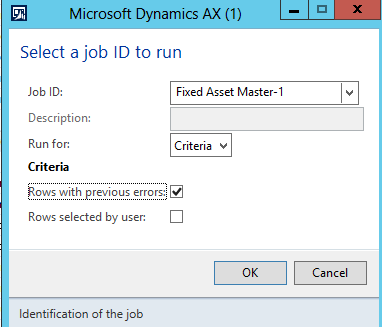
This will insert the rows with errors.
All the information has now been uploaded successfully.
The next step is to get to Fixed Assets module and create and conquering journal. The acquisition data will be date of Become Live equally you will take fixed assets from many years for which the periods do non be in AX.Once the acquisition journal is posted you will have to run the post-obit SQL query to reset the acquisition date.
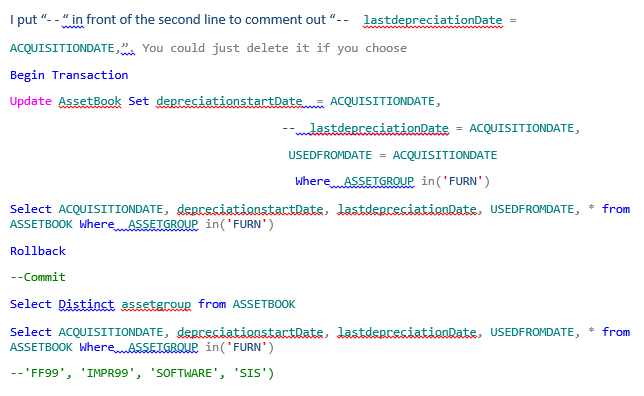
After this procedure, you tin can run the depreciation proposal also and you are all fix.
RSM is a national partner for Microsoft Dynamics AX offering comprehensive professional services for Dynamics AX. We bring a latitude of feel and deep industry knowledge to integrate and streamline all aspects of your corporate operations. For more information on how we tin help you with your Dynamics AX implementation, contact our professionals at erp@rsmus.com.
Written past: Sunit Parikh
harrisonthomedran.blogspot.com
Source: https://technologyblog.rsmus.com/microsoft/dynamics-365-for-finance-and-supply-chain/using-microsoft-dynamics-ax-data-import-export-framework-dixf-module-upload-fixed-assets/
0 Response to "How Do I Upload Pictures Into Weebly Assets"
Post a Comment